Showing posts with label make up. Show all posts

Monday, 28 April 2014

Rimmel Colour Rush Balm REVIEW!

Hey guys! :)

Before I get started on the review, be sure to check out my new video of an unboxing of the Canon SX170 IS camera here:
https://www.youtube.com/watch?v=UqjY8Js7QzY&list=UUAYO6o3jaVP7hjqOuPw7_LQ

So lets get started :)

A couple of weeks ago I bought the Rimmel Colour Rush Balm in the colour 'Drive me Nude' I have now had this product for two to three weeks and as you can see the writing is already starting to come off of the packaging!
Please excuse the mascara on the lid ;) my mascara is quite messy and I need to invest in a new one!

I quite like the packaging of this product, the thing that drew me to it the most is the fact that it is in the design of a crayon. I have never seen lip balms sold in this way as they all tend to stick to the traditional stick design.

Another thing that draws me to the product is that the outer-packaging itself is a similar colour to what the product is. For example; I have the drive me nude shade therefore the packaging is a nude-ish colour.

The only bad thing that I would say about this product is that, as you can see the text on the packaging has no hold at all. This happened whilst I was cleaning my make-up but the text tends to come off even after a scratch of your nail.

Here is what the product looks like without the lid, now you can see what I mean about the crayon design. Once the product is starting to run out, you just twist the bottom as you do lipstick more of the product appears.

The product is retailed at £5.99 and can be found in most drug stores such as superdrug or boots, and supermarkets such as ASDA or Tesco!

The product runs smoothly onto the lips and does a great job at staining them! Here is a swatch!:

Here is a swatch of the product on my hand! as you can see I feel that this product has a pink/red undertone to it. Once its on the lips I would say that it gives off a dark pink colour rather than a nude colour.

Although I do like the pinky colour that this product gives off but when I buy a product that tells me it's nude, I expect it to be nude :) as you can see on the picture of the product the nib of the balm is displaying the pinky colour that it applies onto the lips

Overall I would rate this product: ★★★★ 3 to 4 out of 5 Stars! :) 

I rate the product 3 to 4 out of stars one for the product's writing coming off very quickly, and the colour being more of a pink than a nude.

Thanks for reading guys! :) be sure to come back to read more of my posts! In the mean time, why not visit my YouTube channel? iBeauty1995x

♥

Saturday, 5 April 2014

Reason for my disappearance :P

Hey guys! 

I just wanted to post this to let everyone know on bloglovin why I haven't been posting :) 

Because I'm coming to the end of my college course I have a lot and I mean a lot of coursework to be doing! Over the past month I've been working on a portfolio and only just handed it in yesterday :) now I have a bit more time on my hands I will start to post again! I'm thinking of doing the following;

- lush product review 
- BB cream product review / first impressions
- face care product review 
- I have a haul video for you that I've been trying to upload but it doesn't seem to be working-.- 

I am also going on holiday a month today:D so be prepared for;

- what's in my suitcase 
 - what's in my make-up bag
- holiday clothes hauls 
- beauty hauls 
- what's in my carry on? 
-OOTW
- what's in my beach bag.. Etc! 

If you have any ideas I'd love to hear them :D just leave a comment or e-mail; ibeauty1995x@gmail.com 

Mwaaaaaaaaaaaah!x

Wednesday, 26 February 2014

Finally got the Urban Decay Naked 3 Palette!! :D

Urban Decay - Naked 3 Palette!


Hey guys! I've been meaning to get this post up for ages, but like I said in a previous post I have been revising for my theory test - which I passed (yay!) on top of college! so this is the once chance I've had to get this post up for you guys :) I wanted it to be a good quality post rather than just a quick one so I have spent some time doing this! :)

So, lets get on with the review/swatches...!
< - - - A rather creative photo :') (some may disagree:P)

A couple of weeks ago I received the Urban Decay Naked 3 Palette, this is the first product I have owned from Urban Decay and is probably (well definitely) the most expensive part of my make-up collection as the product retails at £37.00!

The palette purchased the palette from Debenhams which can be found here:
http://www.debenhams.com/webapp/wcs/stores/servlet/prod_10701_10001_123932030999_-1   

So when I received this product  it just came in the normal Debenhams black packaging and inside was a cardboard box, now this cardboard box was filled with soooooooooooo much cardboard! I mean, I've ordered breakable products with less protective packaging! ;)


Okay, so this is what the palette looks like whilst its still inside the packaging :) I quite like the idea of a box packaging for a palette like this as it does not only make it look more expensive but it protects the product and makes people more attracted to it. As you can see, on the front it just has the 'Naked 3' Urban Decay in quite large letters personally, I think the gold upon the brown makes it stand out more and is quite eye-catching, what I found is that it also relates to some of the colours within the palette, along the bottom of the box it also gives an idea of the colours that are inside the palette but also gives the packaging an attractive effect by making the colours look rough and smashed. My favourite part of the packaging is the leather-like feel that the box has.
On the back of the box it just gives a small overview of the palette obviously trying to attract the market to the product. I doubt that you guys can read the writing on the back of the palette from my photo but the write up on the Debenhams website is pretty much what it says on the back of the packaging :) and then as you can see the four little 'tear' shapes underneath, these are the sample primer potions which come within the palette, I will insert a picture below:


You receive the following primer potions;

- Original: I've used this one myself and I was a bit worried that it was going to appear light on my skin as I have olive skin and wearing a foundation underneath may have made this primer appear lighter. I feel that the primer blends in well with the foundation you are currently wearing - I highly recommend this! Here is what Urban Decay say about it: "This undercover wonder works invisibly to keep colour in place"
- Eden: Although I have not tried this primer as of yet but from looking at it, it appears to be darker and a more nude than original. Here is what Urban Decay have to say: "This nude matte formula preps lids and prevents shadow meltdown."
- Sin: This primer appears to be again, a lot darker than the other primers within the packet but it contains slight shimmer I believe, Urban Decay say: "Just a dab of this shimmering formula prevents fading and creasing."
- Anti-Aging: This primer is a similar colour to 'Original' it is a usual light skin colour Urban Decay claims that it "makes shadow last AND in an 8 week clinical study: 100% of participants had a measurable improvement in the appearance of fine lines and wrinkles.
- 100% had measurably brighter skin
- 97% had a measurable improvement in radiance and clarity."

Urban Decay claim that each primer potion pod holds about a week's worth of primer! 

Finally; On the back of the packaging it also has a picture of the crease and shadow brush which is included within the palette - I have heard on previous reviews on YouTube that most people do not like to use this brush but as I do not own many make-up brushes I think that this is a handy brush, but it is also in good quality and the bristles are very sturdy but at the same time soft to the skin.

Here is a close-up of the make-up brush which is included within the palette: 


And here is the palette outside of the packaging! the front 'Naked 3 Urban decay' lettering is pretty much the same as the lettering on the packaging :) (I'm not sure what the little piece of plastic in the photo so just ignore that ;)) The packaging is pretty much a brown tin material, my favourite part of the palette is the bumpy texture that it gives as it is unique to the palette! My favourite part of this packaging is the 3D feel that the pictures of the primer potions of the brush give as it is unique to other palettes!

As I have seen in other peoples reviews on YouTube this palette comes with a more secure lid compared to the Naked and Naked 2 palette which I believe were held closed by magnet force.

As you can see; the palette comes with a 'letter boxed' shaped mirror, I think that it is a great sized mirror compared to other mirrors that may come with eye-shadows, powders or just a usual compact mirror. Although I do not use it myself; in emergencies it will definitely be helpful! As all you guys probably.. well definitely already know; the palette comes with 12 neutral 'rose-gold' shades which I will go into more detail down below :)

Swatches! - So from left to right here is a short overview of each colour within the palette :)

First is the lightest colour in the palette also known as 'Strange' this is the first of three matte colours within the palette but could also be looked upon as a satin as it gives off slight shine to the shadow and is amazing for highlighting the brows or a base colour! as you can see in the picture I have included a picture of the colour itself within the palette, a swatch on my arm and another on my finger which shows the colour a bit better as it appears more pact. The only disadvantage I would say about this colour is that once spread (as you can see on my arm swatch) it becomes slightly sheer and may need more than one coat applied.


Next we have the colour 'Dust' which is known as a pale metallic pink shimmer with iridescent micro-glitter. I love this colour especially because it contains the micro-glitter, I like to place this colour on the inner corner of my eye, again this colour is quite a pale/light colour and the only disadvantage would be that it can sometimes appear to be quite sheer as you can see on the swatch on my arm that although it is a sheer colour the micro-glitter within the colour is quite visible which makes the colour all the more pretty and attractive :) 


Now for the third colour in the palette also known as 'Burnout' which is one of the palette's satin colours. My first impressions of this colour before applying it were that it looked like a copper colour and that it may come out on the skin very coppery, almost like a dusky/dirty gold. (similar to the colour trick) but this colour surprised me as it definitely has pink/peach undertones with a small amount of the bronze/gold colour. I think I like this colour more than I thought it would which is always a bonus :) 

I think that this colour is good for putting in the crease or it could be a really nice blending colour! 


The fourth colour! Also known as 'Limit' which is a light dusty rose matte, the second matte colour within the palette. I think that when I swatched this colour onto my finger it looks quite light like a matte white, but when swatched onto my arm the colour just pops and looks amazing! I love this colour because of the rose-pink colour it gives off.

I cant really think of a disadvantage for this colour other than I think that this colour is similar to 'Burnout' if Burnout was a matte colour without the shimmer then in my opinion I think that they would be pretty much the same colour.

Now for one of my favourite colours, 'Buzz' which is a metallic rose shimmer with silver micro-glitter. Again; 'Buzz' is within the same family as 'Burnout' and 'Limit' in the rose/pink-gold family. Although the whole palette is within the rose-gold theme I feel that these three colours stand out the most within the theme.

I feel that this colour is also the most romantic within the palette because of the micro-glitter and the colour it gives off. Unlike the other colours when swatched onto my finger this colour still pops out at you, displaying the powerfulness of the colour - a great colour payoff! I tend to use this colour as a base colour. 


Half way through the palette! Colour number 6 also known as 'Trick', Debenhams/Urban Decay believe that 'Trick' is a metallic pinky-copper shimmer with tonal micro-sparkle. 
Here, I both agree and disagree with Debenhams/Urban Decay as this colour is definitely a copper colour with an orange undertone. I do not think that this colour has any pink within it at all (none that I can see anyways!!) Even when it is swatched onto my arm/finger I can still see no trace of pink at all! 

Moving away from that, I feel that 'Trick' is an amazing colour within itself. It makes your eyes stand out and goes amazingly with my brunette hair! :) 


Now for 'Nooner' the third and final matte colour within the palette! 'Nooner' is known as a medium pinky-brown matte which truly meets up to these expectations. 
From watching many other peoples reviews via YouTube many people have said that 'Nooner' is their favourite colour within the palette, I believe that this is their opinion as it can be used for many different things such as blending, shading or within the crease of the eye. 

This colour is my favourite out of the three mattes within the palette as like I said above, it can be used in many different ways. 


Next is this brown shimmer colour, also known as 'Liar' which is a medium metallic mauve shimmer. This colour in my opinion is very similar to 'Trick', now you guys are thinking 'Trick'? The reason I say this is because of the orangey undertone that it gives off when swatched onto my arm. When in the palette and swatched onto my finger I can see clearly that it is a mauve shimmer colour but once smudged onto the skin I can definitely notice the bronze/orange undertones.

I haven't really used this colour since I have bought the palette so I can't really give an opinion on the colour just yet. But from appearance it looks like a really nice colour and one that would go with any look!

Now moving onto the darker colours within the palette, this is 'Factory' which is supposed to be a pinky-brown satin. Here, I completely disagree with Debenhams/Urban Decay as I would personally describe this colour as a choclatey brown colour and with definitely no undertones or any form of pink within this shadow, this colour also appears to me to have micro-glitter/sparkle but according to Debenhams/Urban Decay it does not.

I usually use this colour when blending whilst trying to create dramatic looks, as I am a glasses wearer I like my eye-shadow to be quite opaque and dramatic so that it can be recognised/seen easier.
I have previously used this shadow with the Maybelline Eye Studio Color Tattoo, 24hr Eyeshadow in the colour 'Eternal Pink' this colour or the colour 'Nooner' with that eyeshadow in the crease looks amazing! Here is the link to the product: http://www.superdrug.com/maybelline/maybelline-colour-tattoo-eyeshadow-eternal-pink/invt/503550&bklist=

The tenth colour in the palette! Also known as 'Mugshot', 'Mugshot' is a metallic taupe shimmer with slight pink shift. Similar to 'Liar' I haven't really used this colour to create any make-up looks, but from the swatches it has a great colour payoff but again I cannot see any pink within the shade.

I can imagine using this shade to create a smoky, everyday look I would probably use this for the outer-corner of my eye to create a more dramatic look.

Okay, so before I go any further with the review, I just want to point out that I am aware of the slight discolouration in my finger swatch for this photo, the reason for this is that I forgot to take a photo for this colour and had to then take it again when there was obviously no more sun-light. So as I say, definitely not the best of photographs but luckily this is a dark colour so it still gives off the true colour with a good colour payoff.

So, now we have 'Darkside' which is almost the darkest colour in the palette! 'Darkside' is a deep taupe-mauve satin colour which I believe looks more like a matte but the slight shine to the colour defines it as a shimmer. I quite like this colour so I tend to use this colour on my lower lash line so it works in partnership with my eyeliner - black of course! It is great if you do not want too much shimmer but not completely matte, to work with your eyeliner. I would recommend this colour to anyone. The only disadvantage I would say about this colour is that it can sometimes come across as grey-ish and requires another layer.

We are now onto the twelfth and final colour within the Naked 3 Palette! 'Blackheart' also known as a smoky black matte with rosy red micro-sparkle. I think this is a gorgeous colour and a lot of people love this colour for it's uniqueness - I can't think of another colour with rosy red micro-sparkle! You can't really see the sparkle in the swatches that I did in the photographs but the photo of the actual colour within the palette displays the micro-sparkle quite well!

I have only used this colour once when creating a dramatic look as I was a bit unsure about mixing the red sparkle with other colours within the palette. I also think this colour is a very romantic colour similar to 'Buzz'.

Now you've read my summary about each colour within the Naked 3 palette, here is a 'full palette' swatch:


Here is a photo of everything that you receive when you buy the Naked 3 Palette:


Naked 3 Palette Packaging, Naked 3 Palette & Sample Primer Potions ---->


And now we come to the end of this everlasting blog post!! I am sorry it was so long guys I just wanted to create a good detail blog post for you - I hope it was worth it! :D

Don't forget to follow me on Bloglovin' you can find the button on the top right hand side of my Blog :) or search 'iBeauty1995x'

Bye guys :)
Mwaaaaaaaaaaaaaah!x

Saturday, 25 January 2014

Maybelline New York Super Stay 24h Waterproof Powder - Review!!

Maybelline New York Super Stay 24h Waterproof Powder - Review!

Hi guys! :) So, I know I haven't got the chance to post many blog posts or videos recently. I am currently revising for my theory test - in the hope that I pass!!! :) 

Anyway, heres my review :) 

 So, as you can see the powder comes in the usual, expected, plastic packaging in which most powder products are in, with the simple maybelline new york text and a clear 'swatch' of the colour. Although I always find the actual colour of the powder varies so don't put your whole trust in this picture! 


In my opinion, I think that the picture on the products' packaging is quite similar to the product itself. I purchased the product in the colour 21 Nude. I think that the product itself is very matte and provides good coverage (take that from a person with bad skin!) Although the product has good coverage and claims to be waterproof, I think it works well with very oily skin (such as mine!) although my skin still feels oily the powder minimizes this so it does not appear as oily. I am going on holiday in May, and I am currently trialling a number of waterproof products which I am able to wear whilst I am away
although I don't wear too much
make-up when on holiday.

The product itself also comes with a high quality 
mirror, unlike some of those products with the 'plastic-like' mirror to them. I tend to use this mirror for places in which require more attention such as applying liquid eyeliner to my eyelids. The product also comes with a sponge applicator although it is not made out of the fabric that most powder applicators are made from, I think the main purpose of it is to protect the mirror from becoming dirty. 
I apply my powder with the powder brush which can be found in my previous blog posts, I purchased this powder from Superdrug (along with most of my other make-up products) for £6.99, You can purchase the product here:

http://www.superdrug.com/maybelline/maybelline-superstay-powder-nude/invt/586555&bklist= 

PROS:
- Long lasting
- Great for oily skin
- Useful and attractive packaging
- Provides good coverage and colour - no need for bronzer!
- On sale in most drug stores and won't break the bank

CONS:
- May need to be reapplied depending on your activity
- Limited amount of shades

Overall, I would recommend this powder to anyone as it is suitable for any skin type and colour!

Thanks for reading guys:) 

Mwaaaaah!x


Monday, 2 September 2013

Product Review: Nivea Lip Care - Soft Rosé (SPF 10)

Hey Guys! :)

I just wanted to post a review on the Nivea lip care lip balm. In the colour soft rosé. I bought this lip balm to replace my cherry chapstick which you may have seen in my make-up collection video. Here is the link; http://www.youtube.com/watch?v=Dm9p0uC8is8

I enjoy sampling multiple lip balms as I love exploring the different textures and brands of lip balm/lip care. I can not go without my daily lip balm and applying this is a must! A popular brand in which I have tried is chapstick. but as sampling this from a friend I decided to go with Nivea and purchase this beauty!

Here is a photo of the Nivea lip care lip balm, sorry about the low quality photo guys, I just wanted to get this up and posted for you as I have not posted or recorded in a while!


This is the appearance of the lip balm from the front, I have only had this lip balm for just under a week but I am already loving it! As you can see the lip balm comes in a plastic packaging, identical to a lipstick product, I have never purchased a product from Nivea but this time was an exception!


Although the lip balm itself is a rose colour, it does not tint or stain the lips. I feel that the lip balm applies well and is only in need of a single coat, it finishes well on the lips with a smooth, un-greasy like appearance.


I purchased this product from Superdrug and it retails at £1.75 for Net wt:4.8g.
Here is the link to the product: http://www.superdrug.com/hand+lip/nivea-lip-care-soft-rose-48g/invt/559047

The one thing that I like best about this product is that it contains SPF 10. although this isn't as high as some past lip balms that I have purchased, containing SPF 15, any form of protection against your lips is a bonus for all seasons!


Pro's
  • Soft and smooth to apply
  • It is not greasy when applied and wears for a reasonable amount of time, depending on your activity
  • Attractive packaging
  • Anti-shine product
  • Contains SPF 10
  • No odd smell/taste
  • Wearing time 3-4 hours

Con's
  • Claims to tint your lips, but in my experience this is unsuccessful

So here's pretty much the Nivea lip care - Soft Rosé. I hope you guys enjoyed this review, if you already own this product comment down below and share your thoughts! Or if you are thinking about purchasing this product I would definitely reccommend!  I will hopefully post back soon!

Bye Guys :)

Mwaaaaaaaaah! x

Saturday, 24 August 2013

Nail varnish Product Review! :) ♡

Product Review: Collection Hot Looks 60 seconds Nail Varnish.


Hey guys I'm going to be doing a product review on the "Collection 60 seconds nail varnish."

I've had this nail varnish since March.. and yes, you're now thinking March?! that was 5 months ago and you're only deciding now to do a product review? The reason for this is that I have only worn this product twice! So lets get started! :)

I bought this nail varnish for a birthday party, I did not really look carefully for a nail varnish product. I just wanted something to go with my outfit which was currently a leopard print bralet from www.karmaclothing.co.uk here is the link: http://www.karmaclothing.co.uk/clothing-c1/karmaclothing-leopard-print-front-zip-bralet-p332

This isn't one of my favourite products as it applies watery and very sheer! to even create a block colour I would need to apply 2 to 4 coats depending on the size of your nail.


PRO's :
- Long lasting colour
- Great wearing time! between 2-7 days depending on your activity eg. swimming etc.
- Very bold upon nails once applied
- Looks great once on
- True to word - does dry in 60 seconds!

CON's :
- Very sheer colour
- Very watery, runs down your nails when applying
- Not very water resistant chips even when has first contact with water.

Overall, as I have more Pro's than Con's for this product I would recommend to a friend but this product could be improved by making it thicker and less watery.

I got this product from Superdrug which unfortunately is currently unavailable on their webpage. Here is the official Collection website which includes this nail polish:
http://www.collectioncosmetics.co.uk/nails/nail-polish/hot-looks-nail-polish.aspx


Love you guys!:)

Mwaaaaaaah! x

Sunday, 18 August 2013

First Beauty Video UPLOADED! | ♡

Finally! my first beauty video UPLOADED! | ♡
 

Hey guys! :)
So Finally I have my first beauty video uploaded! It isn't the best quality as I was recording on my iPhone!
Many thanks to YouTube user "Unknown000person" for the remix he made, which I used in the intro of my video! :)
I'm going to continue to post things here on my blog so please don't loose touch! :)
If any of you guys have any ideas in which I could post on my blog, or a YouTube video then please let me know either at my Email!
or via my YouTube channel! : ibeauty1995x
I love you guys! :)
Mwaaaah! x

Wednesday, 7 August 2013

Make-up Routine :D

Hey guys! :) I Just wanted to post a simple make-up routine of mine! I wouldn't really call it a smokey eye so lets call it a semi-smokey eye :)  I decided to include this within a blog instead of a YouTube video as I am just trying to get into the hang of things and just post a few things within my blog :)
Let's get started :) ... 
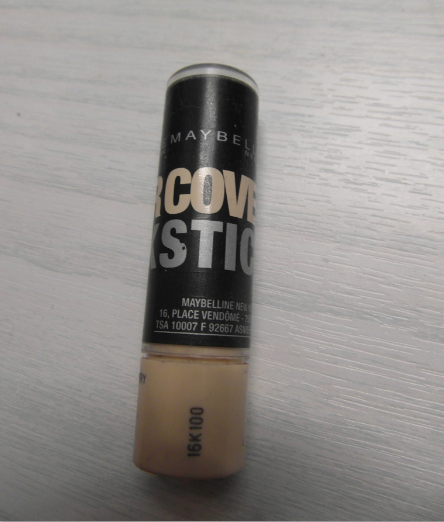
Firstly, I apply a primer but as I have ran out of that I am going to apply my Maybelline New York Cover Stick Concealer, in the colour "01" Ivory. I purchased this concealer a couple of months ago from Superdrug and I still have a lot of it left. I paid £4.09 for this concealer and in my opinion this is a really good concealer which provides high quality coverage with a matte finish. The only negative area of this product is that it is not waterproof and any coverage may show through during the day. I apply the concealer using my finger as I feel that it would last longer other than pressing the whole thing onto my face. Here's the link if you guys wanna check it out; http://www.superdrug.com/face/maybelline-concealer-stick-ivory/invt/667552&bklist=

Next I apply my Rimmel London Wake me Up Foundation, again in the colour "100" Ivory. I personally like that this foundation includes SPF 15 and also a light shimmer. If you are the type of person who prefers matte finishes then maybe this isn't the foundation for you. Although the foundation provides a high quality finish and good coverage it includes shimmer in which shows up in the light, this foundation is my favourite for scents as other foundations I have used have not smelt very nice, this foundation has a fruity smell which I personally love! I purchased this foundation from ASDA, I believe they don't stock this product anymore as it is no longer on their webpage but Superdrug do stock this foundation for £8.99. Here's the link if you want to purchase; http://www.superdrug.com/make-up/rimmel-wake-me-up-foundation-ivory/invt/380852&bklist=


Now its time to apply powder! ;) I purchased this powder from Superdrug. This is the Rimmel London Stay Mattpowder in the colour "001" transparent. This powder was £3.99 I will put the link here;http://www.superdrug.com/rimmel/rimmel-powder-stay-matte-pressed-powder-transparent/invt/592471&bklist= I use this powder to set my foundation and to give it a more finished and matte look, I have been using this product for a couple of months as you can tell by the picture ;) I would recommend this powder other than a tinted powder as it doesn't affect the appearance of your foundation such as distorting the main colour of your foundation.

Next we have the old fashioned but trustworthy Chapstick! :) I have this Chapstick in the colour/flavour "Cherry" I purchased this Chapstick around 11 months ago and its still going! .. just about ;) I bought this product from Boots, they still stock this product but in an updated purple packaging for £1.05.Boots also stock alternative flavours/colours such as the original Chapstick including SPF10, Apple, Soothing medicated and strawberry.
Go check it out!; http://www.boots.com/en/Chapstick-Cherry_955275/
 Next is my eye-shadow/blusher palette. Unfortunately I am unable to provide you guys with a link to this product as it is unbranded and I had this given to me as a gift. I am pretty unfamiliar with this palette as I was never an eye-shadow wearer. Today I used the white & black [top left] to create the "semi-smokey" look. Other stores such as Superdrug, Boots etc. will stock an alternative version of this palette,
Such as;http://www.superdrug.com/accessorize-/accessorize-masquerade-palette/invt/557054&bklist=
Or; http://www.boots.com/en/Too-Faced-Glamour-To-Go_1252787/

To apply the black eye-shadow I am using a small eyeliner brush to put this right in the crease and the outer edge of my eye, This brush is unbranded but here is a similar product;http://www.superdrug.com/barry-m/barry-m-eyeliner-brush/invt/429650&bklist=
Here I am using the eyeliner brush stated above to apply the black eye-shadow into the crease and outer edge of my eye, I am not putting the eye-shadow any further than the crease as I will be smudging and blending the eye-shadow shortly. I have decided against a wing for this look as I don't want it to look too dramatic.


Next I am going to apply my Rimmel London Glam eyes professional Liquid Eyeliner. I applied this eyeliner on my lid next to my lash line, tracing over the black eye-shadow making it look more defined. I purchased this eyeliner from ASDA for £4.98. In my opinion this is one of the best eyeliners that I have used, the applicator brush is very thin so if you're used to using thicker applicators then this would take some time getting used to. [don't worry this happened to me too(; ] Unfortunately this eyeliner is not waterproof but I am able to gain a full days wear from it, I personally love the way this eyeliner applies, it applies jet black and matte. There are no cracks when applying or wearing this eyeliner and overall I would definitely recommend. Check it out here; http://direct.asda.com/Rimmel-GlamEyes-Professional-Liquid-Liner---Black-Glamour/004631677,default,pd.html :)


Now it's time to apply my Rimmel London Special Eyes Precision eyeliner pencil! :D I purchased this eyeliner from Superdrug.
(I live in this shop :P) I got this in the colour "jet black" for £2.99 I love the way that the eyeliner applies, it is soft and matte.This eyeliner isn't too light like some eyeliner pencils appear grey, this one definitely applies jet black! I applied this eyeliner to the outer corner of my waterline under the eye-shadow, just focusing mostly on this area ensuring I was applying lots of colour then finally tracing over my waterline.
Check it out; http://www.superdrug.com/rimmel/rimmel-soft-kohl-kajal-eye-pencil-jet-black/invt/512111

Here is the look so far.. (sorry about my eye being rather scary haha! but whatever:P as you can see I have focused more on the outer corner of my eye, I have also applied a small amount of eyeliner to the inner corners of my eye but my main focus for this look is the outer corners.  


Now I have applied the eye-shadow and eyeliner it is time to blend! using a small blending brush, again this is unbranded and I am unable to remember where I purchased these so I have found you guys an alternative! :) Check it out; http://www.superdrug.com/superdrug/superdrug-blending-brush/invt/560901&bklist= :)
I am using the blending brush to smudge out the black eye-shadow from the outer corner of my eye, I don't like to smudge it out too much as you wouldn't be able to see it on my face as I am a glasses wearer.


Next I am going to apply the eye-shadow that I am wearing on my lid, for this look I am going to be using the colour white from my palette. Unfortunately as this palette is unbranded the colours have not been provided with a name so in this case it is just "white." (boring I know ;)) I personally like this colour as it includes a lot of shimmer and I am able to blend the white into other colours. I am going to apply this colour to my lid using my finger as I feel that it applies a lot thicker and more matte, I am aiming for this so that the colour stands out.


<<<< And this is what the white colour appears like on my lid. 
I have created a grey colour using the white and black eye-shadows by blending them together. I feel that by blending these two colours it provides a more smokey look and helps the black eye-shadow and liner to stand out. I am  aware that it is a bit messy but all it needs is a little more blending!


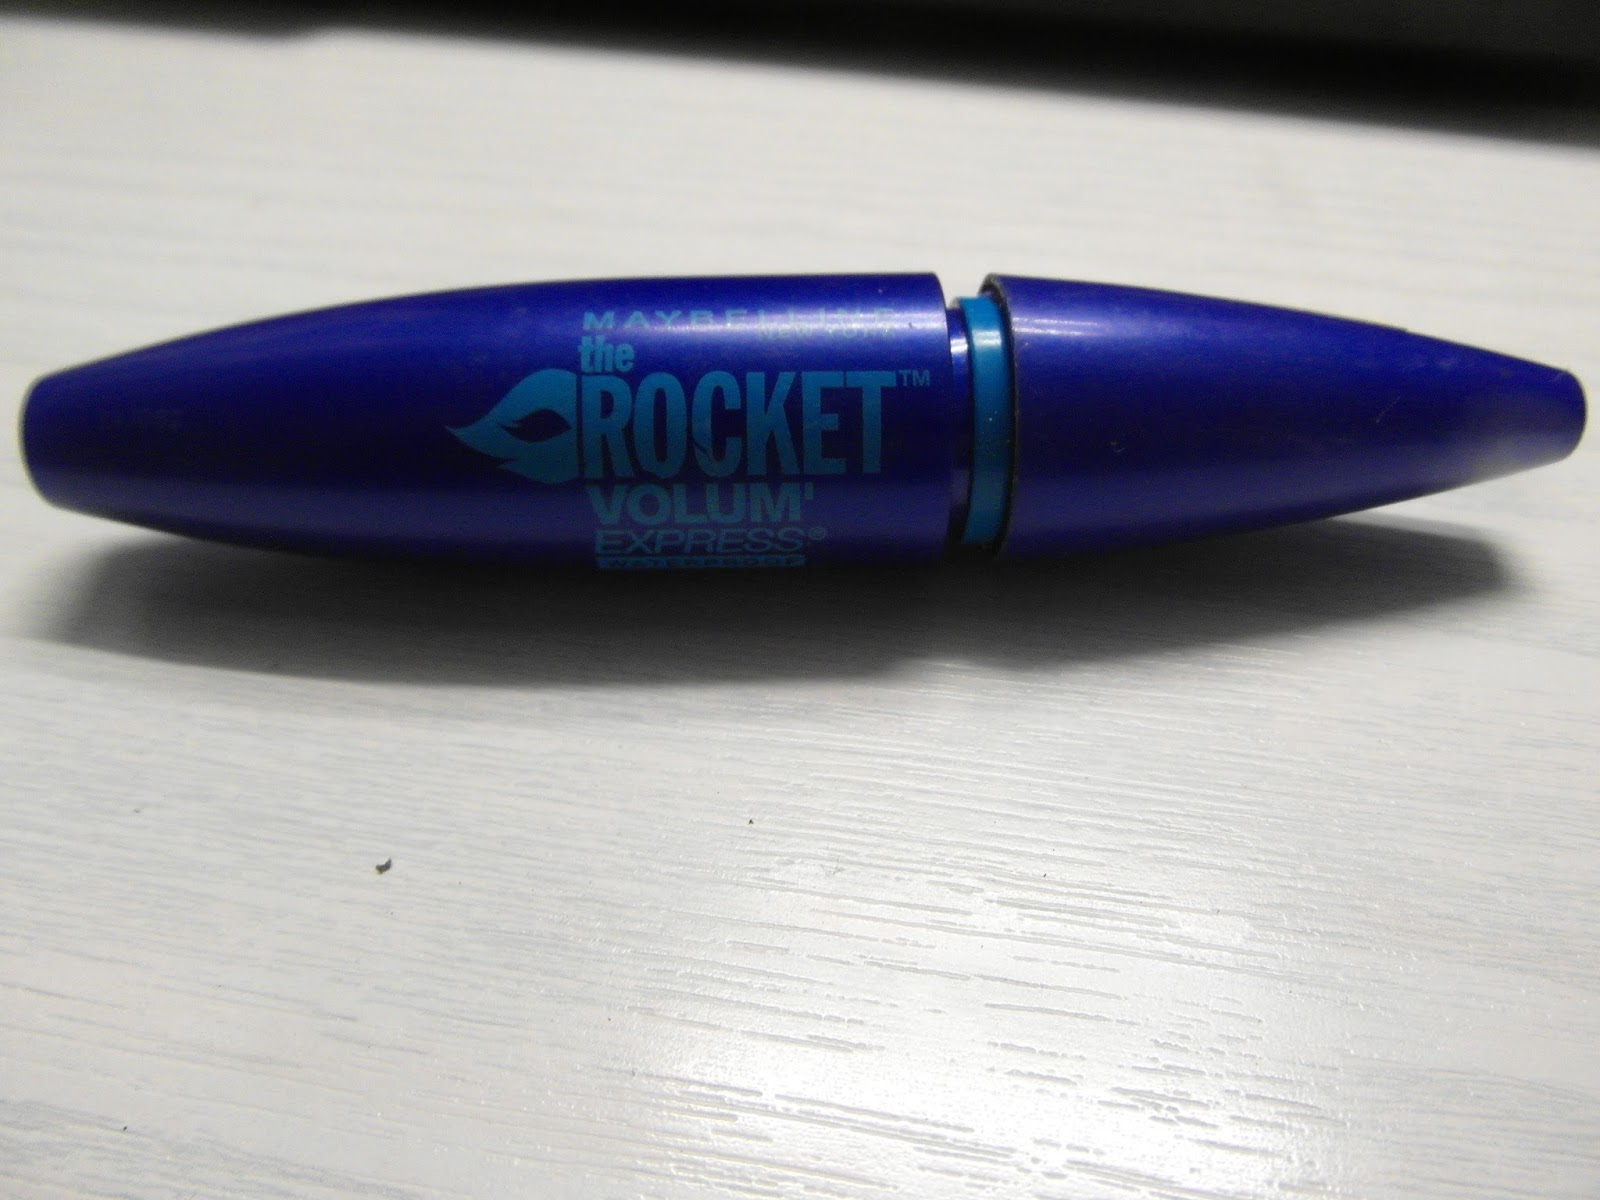
Now onto my lashes! I am going to apply my Maybelline New York, Rocket Volum' Express mascara! I have this mascara in the waterproof version. I purchased this mascara from ASDA for £7.98, I have previously owned one of these mascaras but in the non-waterproof version. For my birthday I was planning on going on holiday with my boyfriend which consisted of a hot tub, and for what we didn't know.. very hot weather that week! so a waterproof mascara was a definite must! I have no negative points towards this mascara as it does what it says it does.It is waterproof, it has excellent wearing time, it does not run and it does not clump your eyelashes together!
Here is the link for this mascara! :)  http://groceries.asda.com/asda-webstore/landing/home.shtml?referrer=cookiesDetecting#/product/910000995102


<<< Here is the look after the eye-shadow and mascara applied! :) I tried not to make this look too dramatic as it is just an everyday, stay at home look. To make this look more dramatic you could add more black eye-shadow so you are able to smudge it out further, add a wing using the liquid eyeliner and you could also apply fake eyelashes!


We are nearly there guys! haha, so up next is my eyebrows.. for my eyebrows I am going to use my MUA eyebrow pencil in the colour "brunette." Again, I purchased this product from Superdrug for £1.00. It is double-ended which in my opinion is very handy as it saves me from carrying around an eyebrow pencil and an eyebrow brush. The pencil comes with two lids for each end, which I am currently using one of the ends for an eyeliner pencil which has lost a lid! :( This pencil is very soft and sharpens without any trouble, it blends in perfect with my eyebrows and doesn't smudge/run in the heat or in water.


<<< Here is the finished look including all of the above products! This is how the eyebrow pencil looks, I own some eyebrow stencils but this look was carried out without them. I did not use very much of this pencil I just ran it lightly over my eyebrows and filled it in.


Finally, this is the last product that I used to create this look, This is the Collection 2000 Fix me up long lasting make-up fixer. I did not intend to buy this when I bought it but Superdrug had a 3 for 2 deal on. I bought this product for £3.99 I feel that this was a good buy as I feel confident that it is going to hold my make-up in place throughout the day!


Thanks for reading guys! hope you like my look! :)

I Love You All!
Mwaaaaaaah! x